
How to change a taps ceramic disc

Ceramic discs are found on most modern taps. They are usually extremely resistant, designed to last for a lifetime, maintenance-free. However, this is not always the case. Occasionally, they do wear out, causing dripping and leaking. The reason for this is hard water which is full of minerals, harmful for all household appliances that use it.
When the ceramics wear out, the whole cartridge has to be replaced, not only the discs. Here are simple, step-by-step instructions on how to solve this problem and replace a ceramic disc when it gets damaged.
Step 1 – Equipment
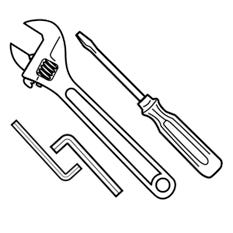
The first thing you should do is buy a suitable cartridge (left and right handed). We recommend you bring your old cartridge to the shop just to be sure. Next, you will need the following tools:
- adjustable spanner
- cross head and flathead screwdrivers
- Allen key
Step 2 – Preparation
Before you start working on replacing the cartridge, the water supply needs to be turned off – you will find the valve under the sink. Or, you can turn off the main valve for your household, usually found near the water meter. After you do this, run the tap and let all the water drain from the system. Use a plug to prevent debris from falling down the sink.
![]()
Step 3 – Tap head removal
Removing the tap head shouldn’t be difficult. In case where the head doesn’t pull off, you should look for a retaining screw that’s usually located under a hot or cold cap. Undo the screw with a spanner after removing the cap with a flat head screwdriver.
![]()
Step 4 – Removing the cartridge
Now, after lifting off the head, you will need to use the adjustable spanner again. Remove the hexagonal nut and the cartridge, in that order, while holding the tap firmly. Remember the fact that there are left and right handed cartridges – label them somehow to avoid confusion.
Step 5 – Cleaning
Clean the cartridge from debris and check its condition. Check the rubber seal – it may be the source of the problem as well. If you can’t see any signs of damage, this means that the cartridge was only filthy, not worn out. In that case, a simple cleaning with a rag should do.
![]()
Step 6 - Reassembling
Unfortunately, you can’t know what the problem is unless you disassemble the head. If you notice damage, replace the cartridge and/or rubber seal. Fit it into the tap and tighten it with the spanner. On completion, check the function of the ceramic disc cartridges by turning on cold and hot water.
![]()